It is no secret that I love to walk on stilts. Some people do not call what I do, merely walking. They see me crouching, jumping, dancing, kicking, running…really just about anything that you can do with your two legs that is not merely walking. But I do love a good walk, and everyone needs to start somewhere, so I thought that some might find it beneficial to learn a thing or two about stilts, how to get started, and how to move forward from there.
What are stilts?
Good question from there in the back. Stilts are mechanisms that a person can stand on to become taller. In every case, there is a platform for the wearer’s foot to stand on, and in most cases there are braces that attach to the wearer’s leg. These two traits distinguish stilts from heels and platform shoes. You have probably encountered stilts before, but you may not be as familiar with the different flavors available to the world.
Handheld Stilts

Featured in video games classics such as Yoshi’s Island on the SNES, many people think of these when they think of stilts. They can be made at any length and they consist of two poles with ledges that jut out for the foot to stand on. The pole continues past this ledge so that the person on the stilt can grasp them with their hands and brace him or herself using their own arms. This is done by standing in between the poles, shooting your arms forward and then stretching them outward, placing the stilts under the elbow with arms in front of the pole. The hand should grasp the poles with fingers and thumb pointed downward, unlike the Shyguy to our left. This creates a firm, natural brace that does not necessarily feel very natural. The stilt walker must think about pulling the stilt up towards the foot so that it can have an equal and opposite force as they begin to walk.
These are very impractical stilts for performing because they entirely tie up the stilt walker’s hands. They are cool to play with though and are often sold as toys for kids to use when building hand-leg coordination.
“Romper Stompers”

From the baby boomer era, these “stilts” are the least conventional in look. I will cover them mostly for their novelty. Imagine buckets that are turned upside-down so that you can stand on top of their platform bottom. Now imagine ropes that protrude out one side and re-enters through the opposite side. The walker stands on these and lifts up on the rope to create an opposing force for the walker’s foot, much like the hand-held stilts mentioned above. These are not very useful for anything, but the concept of standing on buckets would eventually find a place for stilts in the construction industry.
Pegs
Perhaps this is the stilt image that comes to many who picture performers on stilts. Many kids ask me if my stilts are just a big stick shooting out of my foot. They have good reason. These types of silts have a platform for the foot to stand on and then a pole protrudes out of the foot in a straight line down to the floor where a rubber stopper is placed to act as the foot of the stilt. From that platform up, however, is a brace for the stilt walker to strap their leg in. This takes away the necessity of holding onto a pole with one’s arms because the brace is doing all of that work of pulling the stilt up towards the person’s foot.

There are many purists who think that these are the only type of stilts that a performer can use if they want to be a “good stilt walker.” I highly disagree. They do take more balance and more time to learn the basics of walking, but they are highly impractical because the foot of the stilt is a very small area. Because of this, the stilt walker is required to constantly stay in motion, teetering back from foot to foot. In some instances, stilt walkers are hired to twist balloons at events on stilts. If a performer did an event like that on pegs, then they would have to try to stay in one spot the entire time, teetering back and forth and exert too much energy in an attempt to stand still. There are also tons of fun stories of peg purists who try to take on an escalator but have trouble placing their feet on a moving surface and thus come tumbling down. They do have an advantage to other stilts in that they are very light. If performing in an hour long parade, peg users will exert far less energy because they are required to keep moving in the parade anyway and loose about 20 lbs of baggage.
Dry-wall Stilts

These are the common alternative to pegs. Many of you may not know that these exist unless you are one of the thousands of witty middle-aged men that ask me if I do sheet rock. These stilts were invented for construction workers, painters, and other contractors who found that they do not like to move a ladder every few feet to finish their work. Like pegs, there is a platform to strap the stilter’s feet into and a brace for the leg. The difference exists in the area from the platform down on the stilts. There are normally 2 or 3 points of contact that move as a larger leg that meet again at the foot of the stilt. The foot itself is about the size of a human foot. Most companies also place a spring either at the foot of the stilt or along the leg of the stilt. The spring is necessary for contractors who may be on these stilts for long periods of time because it helps keep their balance if they lean forward, into the stilt and it also takes some pressure off of their own body.
These stilts can be phenomenal for performances, regardless what purists state. Instead of teetering the entire time, you can unleash entirely new moves. The downside is that they are a lot heavier than pegs, so your legs will have to gain a lot of muscle to handle multiple hours on them. They also are not always manufactured to do performance type things, like high kicks and crouches. The spring often pushes back with too much force that the performer cannot bend down far enough to high five a kid. Read my little tip below on how to enhance dry-wall stilts for better performance.
*Tips*
In many cases, that spring in the dry wall stilt can be removed, especially if the brace sits under your kneecap. The human body has a sort of spring built into the knee, and so removing the extra spring in the stilt gives that performer the new capability of reaching lower. Additionally, some stilts have a brace that sits on one side of the leg and a strap that is supposed to hold the leg to that brace. When dancing around, that strap loosens up. This is bad. To keep that from happening, one can buy extra braces and door hinges so that they can hinge two braces together for a tighter hold on the leg. Happy hacking!

Articulate Stilts
These stilts graced the world with their presence after Gary Ensmenger invented them under the brand name “Bigfoots.” Most of their features are similar to the drywall stilts, consisting of the brace, a platform for the foot, and a larger foot for the stilt itself than the peg has. The big difference is an extra articulation point that allows the stilt walker to lift the toe of the stilt with the toe of their own foot.
Effectively, this stilt allows for natural walking patterns and heightened capabilities compared to the other stilts mentioned so far. Often times, the foot of these stilts is more narrow than the foot of drywall stilts, which make them less stable on slippery surfaces. However when dealing with textured surfaces, these stilts can more easily maneuver more easily and the walker can feel out the terrain better than the drywall stilts and pegs. When Gary developed the Bigfoots, he also used aircraft aluminum to make the stilts a lot lighter, finding a happy medium between pegs and drywall stilts.
Bockers/Jumping Stilts
A newer fashion, these stilts have spring loaded legs that look like an archery bow and ends with a peg like foot on the bottom. Braced in at the leg, the wearers can run an jump about 8 feet in the air. The action of the leg is reminiscent the leg of a kangaroo, and there are many pictures online of these stilts used in kangaroo costumes. Many users of this stilt have invented a sport called powerbocking which involves parkour style running on top of the stilts.

*Tips*
If you invest in these, make sure to also invest in a helmet, knee, and elbow pads. It is also highly recommended to insulate the spring legs of the stilt. The spring is sturdy until it gets any type of chip in it, at that time it becomes prone to snapping with the right amount of pressure. Most users will use duck tape to create protective layers on the stilt. If a tear is noticed in the duck tape, it should be replaced immediately. Alternatively, the inner tubing of a bicycle tire can be used as a great insulator.
Digitigrade Stilts
Named after the type of animal legs that these mimic, these stilts are the only kind that does not aim to place the foot of the stilt in line with the shin of the stilt walker. Instead, it follows the toe of the stilt walker in a line toward the ground, actively pushing the heel of the stilt walker upward, the toe down, and the shin forward. Because of the forward shin, there is often a higher level of construction in the entire stilt, but most notably in the brace area.

It is possible to walk on two limbs this way, though it takes a lot of strength, and it can be used to create centaurs, dinosaurs, and the like. Often though, wearers use these with the intention of walking on all fours and thus also create stilts to hold in their arms. This allows them to look like a horse, or a giraffe, or a number of other digitigrade species. Most stilts are learned through a self trust and balance, these stilts take a lot more technical training to master because it involves a whole new way of walking.
Getting Started
So, where do you start? I recommend beginning on drywall stilts or pegs. I prefer drywall stilts because you are less likely to fall in the process and create an aversion, but I do understand that you might build your own pair of wooden pegs for a lot less money than you can buy any type of stilt. Money is money. I will only focus on the mechanics for pegs/drywall stilts. Keep and mind that what I will discuss is applicable to most other forms of stilt walking as well.
Stilts will typically either use straps or a ratcheting system to keep both your leg and your foot in. If using straps around your feet, I highly recommend bolting your shoes to the platform of the stilt as you progress in your usage. Straps wear out, and it is an unsettling feeling to have them loosen in the air. Ratcheting systems have enough teeth on them to prevent this accident to happen, so if you prefer to never have to lose a pair of shoes to this art form, I recommend that you find a pair that ratchets. I however have mostly performed with bolted shoes and can attest to its effectiveness.
When you begin learning, you will want to begin in an area that has walls to paw and flat, level floors or pavement. I recommend learning outside if such an environment exists in your world. If not, you can learn inside, provided that you have enough room to roam around. It is also good to learn in the company of a friend or family member, as they can help you in the process and if something goes terribly wrong.
Strapping In and Getting Up/Coming Down
While it is possible to put on stilts whilst standing up, I highly recommend starting by sitting down. If you are learning inside, I suggest sitting on top of a kitchen counter or a few steps up on a stairwell. Wherever it is, you want to be in a position for the rest of your body to be above your feet and your leg to be able to be pulled up enough to dig your heels into the ground. If outside, follow those same guidelines. Perhaps use a porch’s steps or sit on the back of a truck bed, trunk, or open up your hatchback and sit on the back of that.


When strapping your foot in, make sure that your shoe laces are tight and that both the toe and foot straps are as tight as you can make them without cutting off circulation. While the foot can be looser than this, I do not recommend trying it off the bat, knowing that it is tightly in there will prevent psychological meltdowns later. Next, strap in your brace. This should always be as tight as possible, especially if the brace is only connected to the rest of the stilt on one side. This brace allows the rest of the stilt to act as a mere extension of your leg and any looseness will allow your leg to become vulnerable to giving in. Once you stand up, you may want to have someone aid you in tightening the foot or the brace so that you feel comfortable. If they tighten your foot, then have no fear. If they tighten your brace, make sure that you hold onto something and instruct them on how to tighten it without taking it completely apart.
To rise up, take hold of both of your friend’s hands and merely stand up if you are on a counter or the back of the car and already have the stilts feet flat against the floor. If you are not in this position, then dig the heel of your stilt’s foot into the ground for traction and allow your friend to help pull you up onto your feet. This may take a little bit of core strength, but not much.
Sooner or later you will want to get back down. To do this face your back to where you will want to sit and lower yourself down slowly by pawing a nearby wall, railing, or whatever you are sitting on. Using your hands to slow the descent will keep you from hurting your butt or your coccyx on the way down and will make you feel a lot more stable.
*Tips*
People with very skinny calves and legs may find that the brace does not fit snugly. Use cloth to temporarily pad your leg more in this case and try to find squishy shin guards for a more permanent fix. The shin guards will both protect your shins from bruising and they will allow more bulk in the brace area.
Mike’s 3 Rules
I have three basic rules that if never broken will almost guarantee that you shall not fall. They are: maintain the box; do not cross one foot over another; and never lean back. I will admit to having broken all of these rules on many occasions. It is merely what artists do, learn the rules and then learn how to break them.

If you were to stand in a neutral pose and keeping your entire body open, then this pose would involve your feet to be shoulder width apart and approximately in parallel. Your gut and stomach would point the same direction as your toes. Your knees would also bend in a relaxed matter. In acting, this pose is called neutral and it allows the body to be engaged in the action. On stilts, I refer to this position as “the box.” This box acts like the base of a pyramid. Like a pyramid, the base needs to be large enough to sustain the height. The box can be reduced to the width of the pyramid above it, but over long periods of time it runs the risk of being knocked over by heavy winds or overly aggressive terrains and people. So, I recommend keeping this box at about shoulder width apart. Any time that the feet move on an angle out of parallel, the strength of the base is also compromised. If the box gets too big, it will become more difficult to move and perhaps balance.
The second rule carries the idea of maintaining the box forward. Never cross your legs. This completely compromises the shape of the box and will send a new stilt walker tumbling over. Many people make this mistake when attempting to turn. To avoid it, merely teeter around from foot to foot and turn the entire box with your body. If you ever find your legs crossed, do not panic. Merely shift one of the feet back into the right position to recreate the box.
Finally, do not lean back. Really, the object is to never lean away from the spring that exists in every stilt. In many cases, you may have a mechanical spring built into the stilt. If there is no mechanism, then the spring naturally occurs as you bend your knees. The spring is essential to keeping the stilt walker airborne. The stilt walker can lean a certain distance into the stilt without falling over. However, the spring is always actively working, even when the stilt walker leans in the opposite direction. This can cause the spring to actually force you backwards and make you fall. To an extent, the stilt walker always needs to apply resistance to the spring, their goal is just not to overextend this resistance and cause themselves to fall. For now, learn that the spring is your friend and use it, just refrain from leaning away from it until you become more advanced.
To reiterate, the three rules are: to main a box, to never cross one’s legs, and to never lean back. As you get better at stilt walking, you can break these rules. Just know that in almost every instance that someone has fallen on stilts, it was because they broke one of these rules.
First steps
Congratulations, by now you are ready to stand up and hopefully implement my rules. Make sure that whoever is helping you knows the three rules above so that they can point them out as you break them.
Once up in the air, use your friend’s hands to help balance you as you stand perfectly still in your box. Even if you are on pegs, I want you to use this time to stand as still as you can with this added support. Bend into your legs. Feel out limitations. Discover what happens when you go beyond your forward, backward, and side limits. These sensations are important to understand, as they are your warning signs moving forward.


Next, straighten up your back so that you are not curling your body over your feet. Continue to use your friend to balance you, but keep at this until you find yourself at a point where you can stand upright comfortably. If you are on pegs, use your friend’s hands to help you learn how to teeter from foot to foot and get to the point where you can keep your feet moving in one place without relying entirely on your friend. Remember, keep your feet around shoulder width apart in this process, it will allow you to move your feet without having to look at them, if they are apart, they cannot possibly hit each other.
Grab hold of your friend again. Keep them in front of you with their two hands high. Grasp them. Begin taking your first steps. Relax; it is exactly the same stride that you would usually take. Make sure each step is controlled. If you feel the urge to quickly step forward or else you would fall, refrain. It is perfectly normal, and perhaps the most common sensation that people have when they begin to stilt walk. This usually occurs when the stilter leans too far forward remember to keep your box shoulder width apart and not to cross your legs. Each step should involve picking up a foot and placing it a comfortable stride forward. It should not involve dragging your foot to where it needs to be.
The next step is to wean yourself off of your friend’s hands. Allow one hand to drop and bring your free hand to your side. Just let it dangle naturally. As you become comfortable enough, let go of the other hand, but ask your friend to keep their hands up in the air just in case. Make your way over to a wall and walk along it. If you feel unstable, use the wall to help regain your balance, but practice keeping your arms at your side and walking back and forth.


Turning Points
At this point you may be wondering how to turn around. You would have had to multiple times. Bring back your friend and have their hands in the air in case you need support. Practice teetering from foot to foot in a circle. Think about keeping one foot in the same place as the other foot orbits around. Practice this on both sides. It may take you up to 6 steps to turn 180 degrees. This is normal. Take the time to practice doing it in less. You will get to the point where you step once forward and once backward, turning your entire body in a single pivot, this is a very efficient way to turn, but in some situations, abrupt turns like that may prove less safe, like when a bunch of children are below you. It is always good to remember that a turn can take as long or as short of a time as you need.
Where to Walk from Here
Now that you can do the basics of walking and turning, practice walking to places with an objective. If you can, start on pavement or tile and then progress towards rougher terrains. I normally suggest choosing separated walls, telephone poles, and trees as goal posts. Each one is tall enough for the stilt walker to lean up against if they feel like they need a break. You will begin to find confidence in reaching each objective with time and practice. Thinking about stilt walking in terms of objectives helps prevent the desire to turn without thinking. During events these objectives will become smaller, but stopping one’s self to think about the next destination before a turn is ideal.


Terrains
Stilts are not normally built to have the same traction that sneakers have. Because of that, small changes in terrain can be problematic and large changes can be fatal. As you practice, test out different terrains. I will go into a few common ones, but every situation will be different and cause its own obstacles.
Pavement is typically the most generous because it offers a lot of friction for the rubber soles of your stilt. Keep an eye out for occasional potholes, as these can catch you off guard as your foot drops further than you might expect. Do not let its simplicity fool you. One of my hardest events was on pavement, the road was not perfectly flat, and instead it had two slight inclines that found their apex in the middle of the road. While I did not find many challenging obstacles here, my calves had a nice workout. Typically, pavement does not get too dangerous when wet. This is one of the heavier terrains, so heavy pounding of stilts while ripping out some nice dance moves can cause slight wear and tear on the metal, nuts, and bolts of your stilt.
 Grass is pretty standard, but I find it to cause some problems. When wet, grass gets very slippery. Grass also tends to come in small clumpy mounds at fairgrounds, making it feel very uneven. If the grass is overgrown in some areas, you may miss tripping hazards like rocks, sticks, or small holes. Where there’s grass, dirt tends to follow. Depending on how loose the dirt is, a transition from one to the other can feel a little bit wonky. Keep your eyes out for leaves, when stepped on, they will slide along the grass and bring your feet out from underneath you.The plus side here is that there is enough absorption of force in the grass to prevent a lot of wear and tear on you stilt.
Boardwalks are common venues in New Jersey and I have had my fair share of experience on them. When wet, these can get very slippery for stilts. I have seen many stilt walkers decide to pop a squat on a trashcan if it begins to rain heavily on the boards. I will leave that up to you. A big enough foot on your stilt will keep you from falling, but no matter what stilt you are on, shorten your stride on wet wood. Also beware that there may be some slight height changes from board to board, causing tripping hazards. Typically, not much wear and tear occurs on the boardwalk.
Tile and marble flooring is typically a godsend. You can’t get much flatter than these if you tried. They are the most slippery when wet, but luckily it is easy to tell if the surface is wet. It is not so easy to tell if the floor was recently waxed. I do not advise playing around on waxed floors if you can help it. Marble is also notoriously hard, and my dad continuously shattered a pair of Bigfoots in his days on the marble floors of Showboat because of it.
So, how do we handle terrain? The easiest method is to never drag your feet. Most slipping and tripping problems occur when the stilt is not picked up high enough with a specific step. While your entire focus does not have to be on the ground, just keep a slight note of your surroundings as you walk around. Think of it as often as you would look at the rear view mirror in your car. It will slowly become second nature.
Inclines
You will inevitably encounter inclines. Practice them as often as you can. They generally feel different when on stilts than on your own feet, and that is typically because the stilts’ feet will not adjust like human feet can on impact. As the incline gets steeper you may have to adjust yourself so that you walk on the balls of your feet up hill and the heels of your feet down hill. You will also have to lean ever so slightly into the direction of the hill to keep your belly button over the feet of your stilts.
Stairs
Most stilt walkers will see stilts and automatically search for a ramp. They are also pretty difficult, but one day you will have to walk up a flight of stairs because the ramp is too far away. So practice. Find stairs that have railings and walls next to them. These will at least give you something to steady yourself on as you take steps that are typically much higher than usual. Try to seek out stairs that are deeper at first and slowly move towards regular sized stairs. Get to the point where you can comfortably attack stairs that do not have rails or walls, as you may encounter these at parks or outside stadiums. The key to walking up stairs is to keep your back straight, only slightly leaning toward the stairs and to lift up your leg high enough to then softly place it down. Being hunched over will only cause you to lose your balance.
Learning New Moves
I personally think that events are the best time to learn new moves and to make old news better. Even if a move is not perfect, it is still impressive to a crowd because it holds more energy than walking around does. Always try to push slowly out of your comfort zone. Otherwise, you risk falling.
Some simple mechanics that you need to learn as building blocks for most tricks is the ability to balance on one foot, the ability to crouch down, pivot, twist, jump, and generally be able to swing one leg. You should also learn how to take steps to the side and backwards. A tricky move is the “grapevine” which involves crossing your legs. Instead of crossing them, rotate your hips to keep your box from being completely destroyed as you do this move. Once you have these down, think back to all of those horrible line dances that you learned in middle school. Pick isolated moves from these and learn them. They become great repertoire when out on the dance floor because white boy dancing is generally pretty impressive on stilts. With time and practice, become creative. If you happen to learn any choreography in a show or from friends, try it on stilts!
Costumes
Unfortunately, it is really hard to find stilt costumes. My recommendation is to learn to sew and build your own.

If you get a pants pattern, find the point in the leg that the pants become wide, then cut the pattern perpendicular to the pattern. Get pieces of paper and tape them together to the pattern until the length of the leg is as long as yours on stilts. You will need to either place a drawstring in the waist of your pants or use suspenders to prevent your pants from drooping and tripping you.
Luckily, your shirt size does not change, so any vest, or shirt will definitely work and you can become more creative with them. Hats and wigs are always nice additions, especially if they can add even more height to your person. At outdoor events, try to find ways to incorporate sunglasses or goggles. You will tend to be higher than many tents and will not get much shade, so this will help you block out the sun.
Some people will create foam shoes that they can stretch elastic over for stilts. They are then placed on the stilt using Velcro. I am personally not a fan of that, because it is just another costume piece to have to fix whenever it breaks. Generally, even kids will know that you are a stilt walker. You do not need to hide that fact from them. Shoes can create a nice theatricality though if you want to attempt to suspend disbelief on stage, and I find that people who adhere a regular sized dress shoe to their stilt are pretty mesmerizing.
*Tips*
Sunblock is very important outdoors. If you are applying it, keep in mind that you will likely sweat in the summer heat with so much moving around. Try not to put sunblock on your forehead or in your eyes because being blinded is not very fun. With the heat in mind, choose hats and wigs that can breathe so that your head does not overheat and make you sweat off all of your sunblock.
Types of Events
Events generally break down to three types on stilts: stage, walk-around, and parades.
Stage events are typically shorter and involve intensive skills for a routine. Typically, people use pegs in stage events because they are impressive, but only do this if you know that you will be moving the entire time, otherwise you will need a giant cane or staff to prevent you from teetering and distracting the audience.
Walk-around events involve a static location where the stilt walker is given free range to mingle with the crowd. These are great locations for trying out new moves and posing for pictures. In pictures, put the light source in front of you so that you are not in the dark on camera and always extend yourself so that they can look at you as very tall in hindsight. People in these events typically surround you, so be very mindful of whom you might step on. It is pretty easy to do bursts of energy in these events and then find a break to regain your breath, so do not worry too much about pacing yourself.
Parades are pretty difficult because you want everyone in the audience to find something impressive about you, but it is a very daunting cardio workout. Bust out the dance moves when the parade comes to a standstill and use the time that the parade is moving to catch your breath. When the parade is moving, find pictures to pose for, as it allows you a chance to stop, but always remember to keep up with your section. Otherwise you will end up using all your energy to catch back up with the parade. If the parade is long, find a place in the parade to stash a bottle of water so that you can remain hydrated, but take small swigs.
No matter what type of event or your level of stilt walking, have fun. It is an opportunity to have something close to a super power.
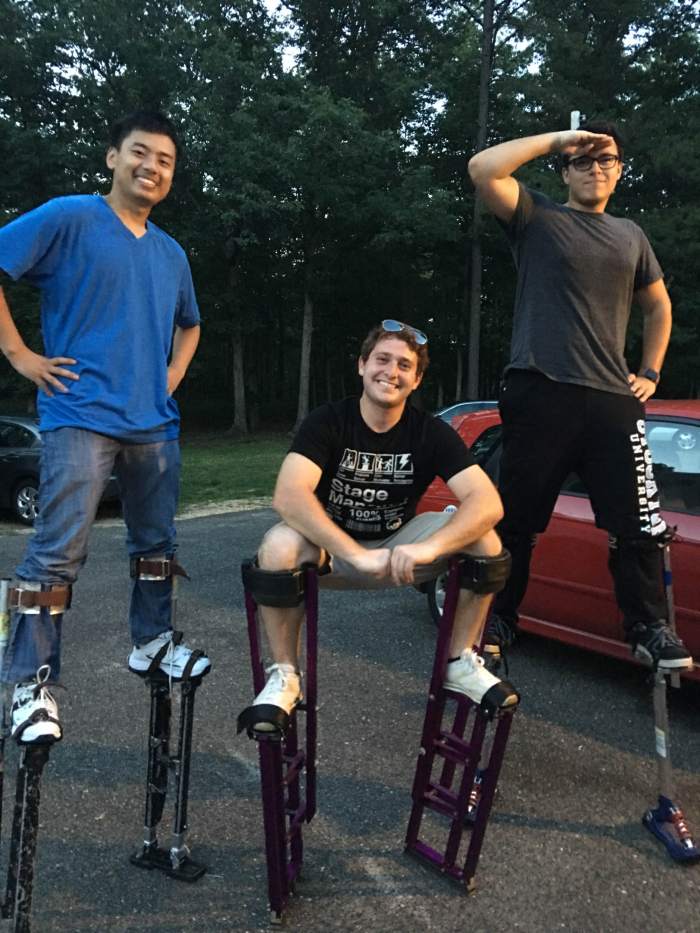
**Special thanks to my friends Andy, Petey and Nicole for allowing me to use (and for taking) photos at our training session!**
